Wednesday, April 22, 2009
Thursday, April 9, 2009
"Harvesting" digital goodies!
Have you seen others using goodies from predesigned pages, then wondered just how to get those parts and pieces into your own personal stash to use over and over again? It's actually quite simple! :)
First, you will need to create a project that will serve as a "workspace" for you to save out elements pulled from the predesigned pages. To do this, create a new project. Select the project size based upon the size of predesigned pages you will be pulling elements from. (So if you have a 12 x 12 Predesigned Recipe Book Kit, choose Storybook - 12 x 12 project size). Choose "Blank" for the theme, click "Next" and name this project something like "workspace".
Next, you'll need to create the predesigned book to pull elements from. Create a new project and select the same sized project as the first. Next, choose the predesigned page kit you want to pull elements from, then select "Next". To make it easier to remove the book after we're finished using it, name it "HarvestBook". (You can save this anywhere - your desktop, or somewhere else on your hard drive that will be easy to locate later).
Once the predesigned pages are ready for you to work with, begin clicking through the individual pages looking for individual elements on each page that you find interesting. To save out an individual element, click on it, copy it, and then click over to the "workspace" project. Paste the element on the workspace. Drag element to near full size on workspace. Right click on the element, then click on "Save Selection". This should default your file to save as a .png file. (Save this is a location where you will find it later). After saving, delete element and click back over to predesigned page project. Continue through all pages, saving out all components from this kit, then close the predesigned pages file. After you have all elements pulled that you need, click here to learn how to add those embellishments to your own batch for use in StoryBook Creator Plus.
After you are finished "harvesting" goodies from a predesigned page project, you can delete it from your hard drive to regain that space. When you create the next predesigned project to harvest goodies from, name it the same thing so you can keep track of what you need to delete.
Looking for some suggestions on what some favorites are for grabbing goodies from predesigned pages? The 12 x 12 Recipe Predesigned Pages is loaded up with goodies - distressed frames, torn edges, ribbons, stitches, a very cool bow, a cool flower, etc. There are several free downloadables themes that are great, too - Vintage Blues, Holiday - Traditional, Seasons, etc.
Have fun!
Monday, April 6, 2009
Embossing your digital papers

Here's how to get an embossed look to your papers in StoryBook Plus in 3 EASY steps:
1. Choose a Paper.
2. Choose an overlay ( used Digital Overlays-Floral) and make it the same color as the background. The overlay will seem to disappear.
3. Apply a light shadow (found in the TOOLS ribbon) to the overlay and you will get an embossed look.
Wednesday, April 1, 2009
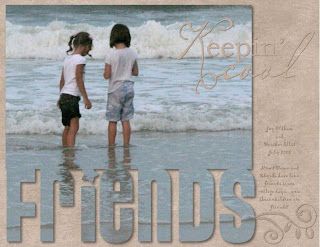
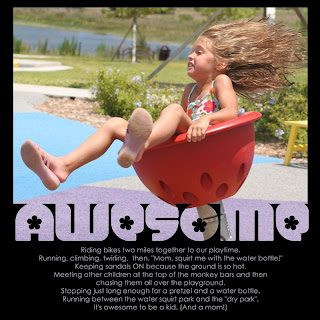
Word Merge - Digital Scrapbook Technique

 Word Merge is a fun technique that allows your photo to flow into text! To get this look, start on a blank 12 x 12 Page in StoryBook Creator Plus.
 Bring the photo onto your page.
(Works best with photos that have the focal point more toward the center of the photo...you can always crop as needed, which is explained below!)
Next, make a text box and type in your word of choice using a “chunky, wide, font.” (Go to Dafont.com to look for some if you need them. On their first page, they have instructions on getting the fonts into your computer!)
Once you have made the text large enough to reach from side to side of your page, go to the top of the screen in the Layout tab and click, “Flatten” to flatten your text.
Now, move the text until it just touches your photo.
Next, hold your shift key down, and click on the photo and the text box. (You will see that they are both gray on the left of the screen in the elements section.)
Now, go back to the Layout tab at the top of the screen and click, “Flatten” again. You have just created ONE element out of the two.
Last, go BACK to the right of the screen and right click on your original photo and choose, “Fill selected element with this photo”.
Your photo will now flow down (merge) into the words you have added!
If your photo is not filling the area just the way you want it to, note that it is filling from the TOP LEFT of the photo you are clicking on in the thumbnail view. You may need to CROP the photo in thumbnail view by right clicking on it, choosing “Crop” and cropping a bit closer in.
Page design by Dawn Oldham

