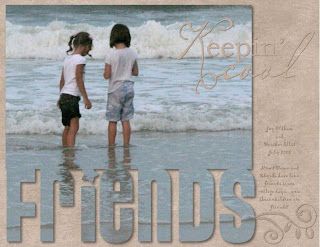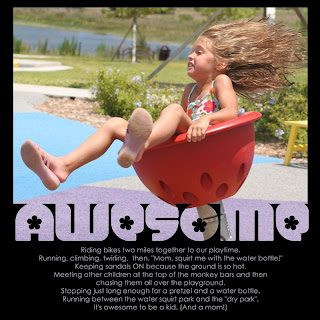
 Word Merge is a fun technique that allows your photo to flow into text! To get this look, start on a blank 12 x 12 Page in StoryBook Creator Plus.
 Bring the photo onto your page.
(Works best with photos that have the focal point more toward the center of the photo...you can always crop as needed, which is explained below!)
Next, make a text box and type in your word of choice using a “chunky, wide, font.” (Go to Dafont.com to look for some if you need them. On their first page, they have instructions on getting the fonts into your computer!)
Once you have made the text large enough to reach from side to side of your page, go to the top of the screen in the Layout tab and click, “Flatten” to flatten your text.
Now, move the text until it just touches your photo.
Next, hold your shift key down, and click on the photo and the text box. (You will see that they are both gray on the left of the screen in the elements section.)
Now, go back to the Layout tab at the top of the screen and click, “Flatten” again. You have just created ONE element out of the two.
Last, go BACK to the right of the screen and right click on your original photo and choose, “Fill selected element with this photo”.
Your photo will now flow down (merge) into the words you have added!
If your photo is not filling the area just the way you want it to, note that it is filling from the TOP LEFT of the photo you are clicking on in the thumbnail view. You may need to CROP the photo in thumbnail view by right clicking on it, choosing “Crop” and cropping a bit closer in.
Page design by Dawn Oldham


No comments:
Post a Comment